I first learned about soldering because I wanted to weld. I had to master soldering pieces of sheet metal together, wire to sheet metal and wire to wire in order to qualify to learn to weld in art school. I decided to make a replica of an Alexander Calder mobile, which would qualify me to fire up the more dangerous mig. In short order I was welding larger and larger pieces to metal together. I had to throw out all that knowledge in order to learn electronics soldering.
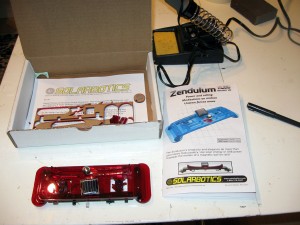
I’d gleefully volunteered to get a kit from Solarbotics and write a review about my experience. Sheepishly I admit that it was about a year ago. I got the package, but then I lost my nerve. I put off opening the package. It wasn’t a good time, I didn’t have enough hours, there wasn’t enough light. I made excuses because I’d promised to publish this and what if it all went horribly horribly wrong? I was intimidated and my stage fright kept the kit in the box (even in the shipping box) for months. It seemed like a good idea at the time, but every time I looked at the box… however a promise is a promise even if it is late. I finally opened the package and immediately fell in love with the red jeweled plexi. I’m glad they sent me a red one.
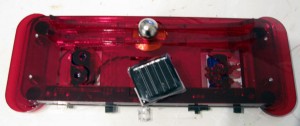
I cleaned my space and gathered my materials, put on a podcast and started following the instructions. Like a puzzle the photo on the front is a nice guide for the final product. I put it up near my work space as inspiration! Step by step I matched and bent and soldered and in then end I got this:
I’m pretty stoked to admit that it worked right off the bat.
So, there are three fundamental things that are different about electronics soldering vs. replica Alexander Calder mobile building soldering. 1. For electronics, you don’t really want to heat up the board or the part too much. 2. You don’t need flux. 3. You can use a technique that I call tacking. It helps that whole ‘I wish I had another hand’ feeling that comes up so often in electronics soldering – even if you do have a third hand. I learned this trick at the Firefly event (Thanks guys!). This technique, by the way, would get you a one way ticket back to the beginning if you tried it in the metal shop. It probably gets you booted to the back of serious electronics class too, but I’m a beginner after all and not quite aiming to start soldering missile guidance systems or anything.
I found the directions easy to follow and almost universally clear. There was one photo I had trouble telling which part was which, but I eventually just closed my eyes and picked the closest part. What I really appreciated was the parts of the directions that basically said Watch out! just was I was about to do something not good. The soldering was straight forward and wouldn’t have taken nearly as long unless you are paranoid about having to perform and you check every single thing at least 8 times before proceeding.
I also set up my video camera and my still camera with CHDK to make a time lapse.
Actually, the one part that was not awesome was putting the base together. It was frustrating to peel the protective paper off the plexi, it was tedious to screw in the components and the metal on plastic grinding sound always gives me the willies. I wish there was a way to test before putting it together, I did have to go back and move a component because things did not fit. Believe it or not, this was the hardest part and I did it wrong three times and had to go back and move the plexi components around.
This was a fun little project that is good for beginner electronics solderers like me. You could even decide if you wanted to make the little squeaky sound when it pulsed to make the ball move. I opted to leave the sound as I found it somewhat comforting to know that my thing was working as well as it is a little like a ticking clock. It is sitting near my front window and my nieces and nephews like to turn it on and hear it chirp away.
I already had a soldering iron and electronics solder from a project a long time ago, and I bought my third hand and small pliers for jewelry so I didn’t need any special equipment. I did it at my (wooden) work table with no issues and no fire! I also managed to keep from burning my self. Well, not too badly anyway. I did have trouble finding a small enough screw driver and ended up using one that wasn’t ideal. I soldered at a work table and I didn’t have a proper hood so I left the window open.
My advice is to split it into a few different sessions. If you don’t have the equipment, take a day for getting all those things together. You’ll also need a container to hold all the pieces and especially the magnetic ball as it kept trying to get away and stick itself to things.  Get a proper fan if you can, I think I probably killed way too many brain cells from the fumes. Then take another day for the soldering and the next for the construction. I took my time and found myself pressured to get it all together as the sun was setting. I had to use my lamp to get enough solar energy to get the ball rolling . The prep and assembly took longer than I thought they would.
I sort of want a way to personalize this project. The bonsai and yin yang motifs laser cut into the base are a nice touch in terms of the ‘zen’ theme, but I’m not in love with them. I have no idea what I would put on if I’d been given the option. My inability to pick probably would’ve caused this to be even later, so it is a good thing that Solarbotics did it for me.
It was much easier and more fun than putting together Ikea furniture.
When did this happen? Well, originally April 2011, actual construction happened in December 2011 and writing this happened in Feb and March, 2012. So sue me!
Disclaimer: I wasn’t paid for this review, but I got the kit for free!


